
Sub-Total: $0.00
Creating a Tanuki Bonsai
Technique, Tradition and Artistic Perspective
The practice of creating a bonsai from two separate sources of plant material, one living and one long dead, has sparked ongoing discussion within the Western bonsai community. These creations are known in Japan as tanuki bonsai and in the West as phoenix grafts.
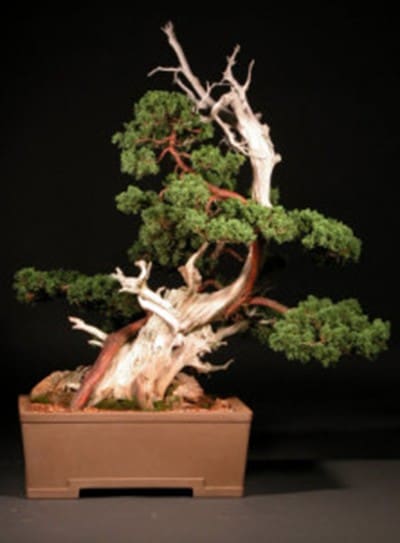
At its core, a tanuki bonsai combines a piece of aged, naturally weathered deadwood with a young, flexible living tree. Over time, the living tree grows into and around the deadwood, creating the illusion of an ancient specimen that has survived centuries of hardship.
Cultural Perspectives on Tanuki Bonsai
In Japan, tanuki bonsai are generally regarded as playful artistic exercises rather than legitimate bonsai. The word tanuki refers to a badger, an animal that appears frequently in Japanese folklore as a clever trickster that disguises itself as something it is not. This association explains why tanuki bonsai are often viewed as visually impressive, yet fundamentally deceptive.
Because of this cultural context, tanuki bonsai are rarely displayed in formal Japanese exhibitions. They are appreciated for enjoyment and experimentation, but not typically judged alongside traditionally developed bonsai.
In contrast, many Western artists view tanuki bonsai through a different lens. The term phoenix graft, popularized by American bonsai artist Dan Robinson, reflects a more symbolic interpretation. Like the mythical phoenix rising from ashes, this technique brings new life to ancient deadwood, transforming discarded material into a powerful artistic statement.
From this viewpoint, tanuki bonsai are judged not by their origin, but by their ability to evoke emotion, realism, and respect for nature.
Understanding the Longevity of Tanuki
A tanuki bonsai is inherently temporary. How long it lasts depends almost entirely on the quality of the deadwood used. Water is the primary enemy. Any deadwood that remains in constant contact with moisture will eventually decay.
Dense, resinous, slow-rotting woods are essential. Old juniper deadwood collected from arid environments is ideal, as it resists decay and weathers attractively over time. Softer woods or recently dead material are poor candidates and will fail quickly.
Some artists treat buried portions of the deadwood with wood preservatives to slow decay. If this approach is used, care must be taken to ensure chemicals do not leach into the soil and harm the living tree.
Container Selection and Long-Term Planning
Tanuki bonsai are not instant creations. Expect a development period of three to five years before the tree begins to resemble a finished bonsai.
Begin with a large training container that allows for strong root development and vigorous top growth. Plastic tubs, wooden grow boxes, or oversized mica training pots are excellent choices. Refinement containers should be selected only after the tree has matured.
Choosing the Living Plant Material
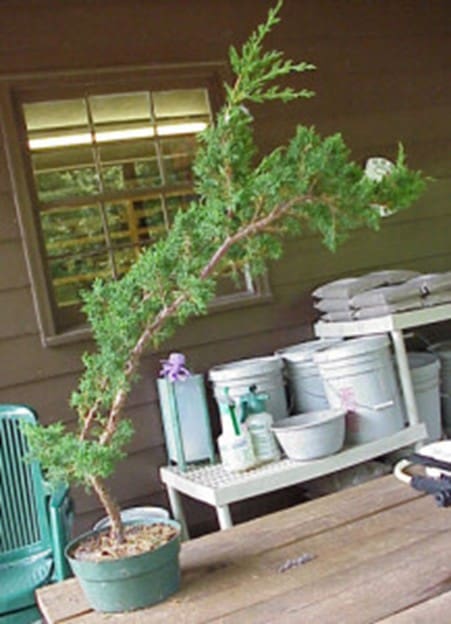
Junipers are the most common species used for tanuki bonsai. They are flexible, durable, and capable of surviving the physical stress involved in the process. Pines, yews, firs, and hemlocks may also be used, though they require more patience and skill.
Young, slender material is preferred with a trunk roughly the diameter of a finger is ideal. The tree must tolerate drilling, bending, and abrasion during installation. Species with brittle wood or delicate bark are poor candidates and should be avoided for early attempts.
The objective is realism. The finished tree should look as though it was shaped by nature, not constructed for theatrical effect.
Assembly Principles and Mechanical Focus
The process of creating a tanuki bonsai is highly mechanical. Artistic refinement comes later. The following steps focus strictly on construction and stability.
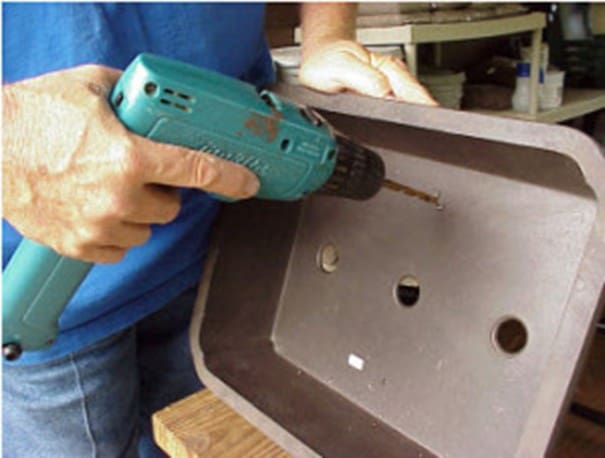
Step One
Prepare the training container by drilling tie-down holes and securing drainage screens. Use heavy copper wire to ensure long-term stability.
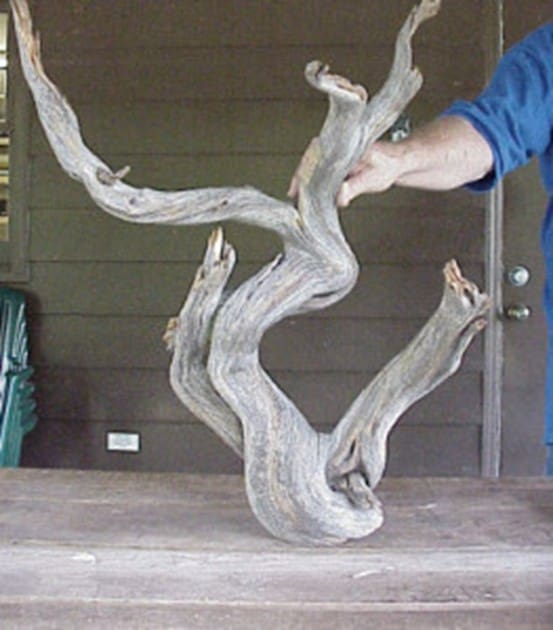
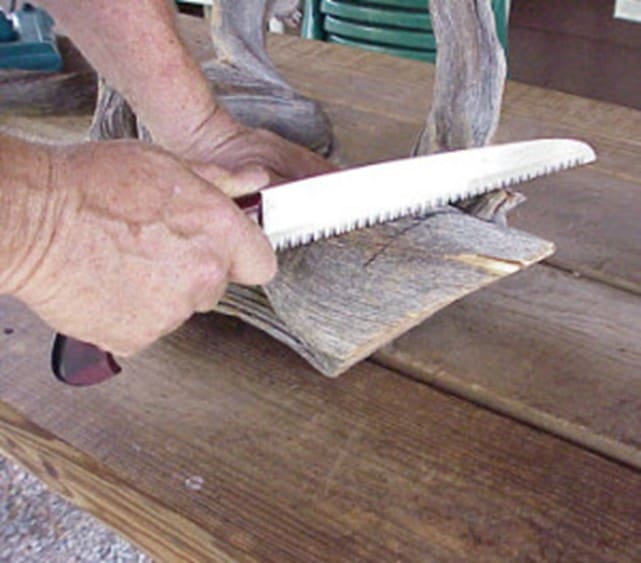
Step Two
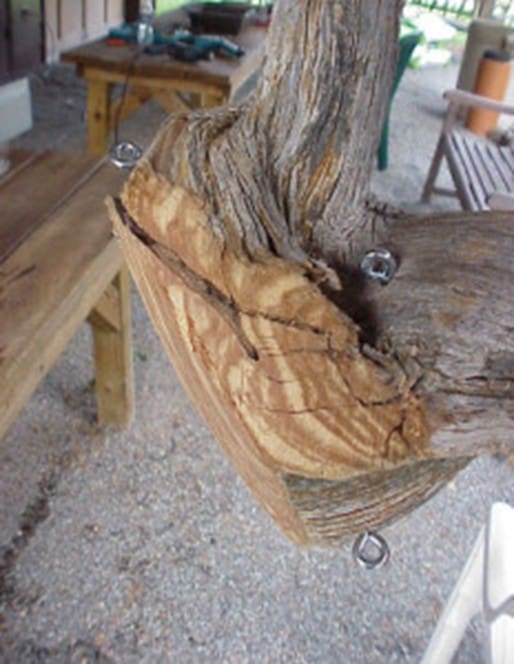
Determine the planting angle of the deadwood. The base must sit flat and parallel with the bottom of the container. Mark and cut the base carefully so it rests securely.

Step Three
Install eyelet screws into solid sections of the deadwood near the base. These will later anchor the deadwood firmly to the container and will remain hidden beneath the soil.
Step Four
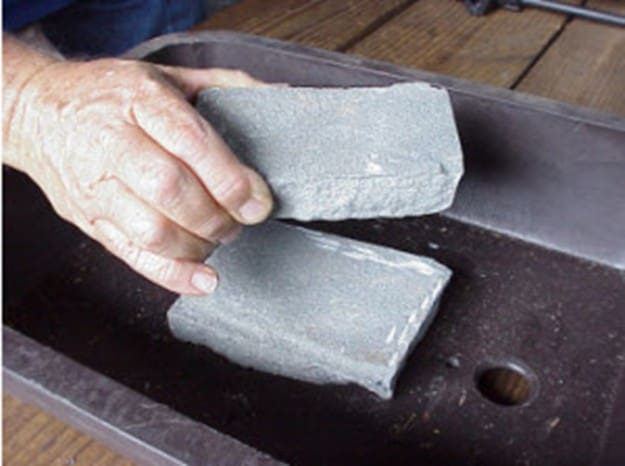
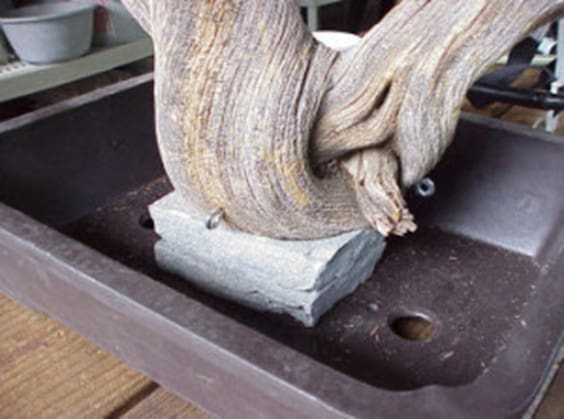
Place stone or slate in the bottom of the container. This elevates the deadwood, reduces contact with moisture, and slows decay.
Step Five
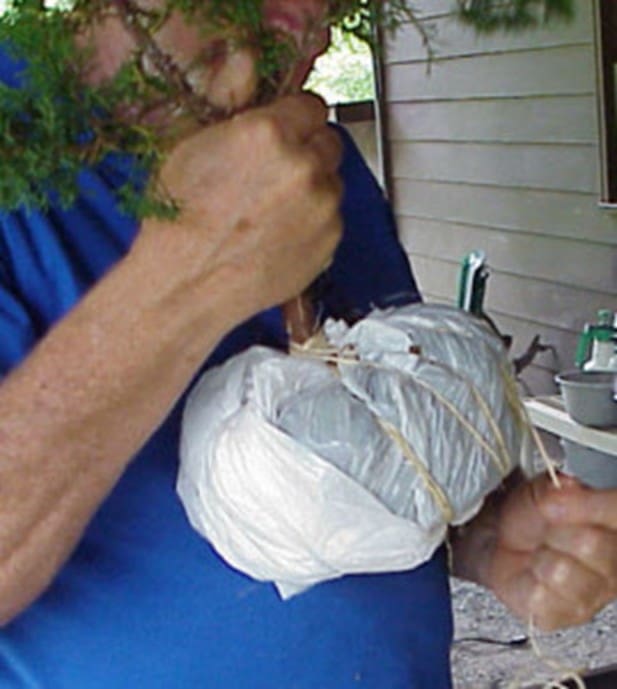
Select the live tree and determine its placement against the deadwood. Remove foliage that will be trapped between the trunk and the deadwood. Mark the groove location. Remove the tree from its pot and wrap the root mass tightly to prevent drying.
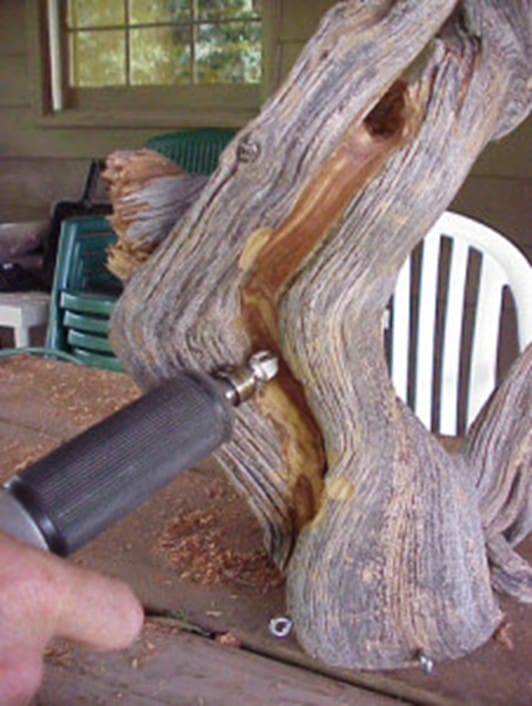
Step Six
Using a rotary tool with a rounded router bit, carve a groove into the deadwood. The channel must be deeper and wider than the live trunk to allow future growth. Ensure that a portion of the live trunk, known as the lifeline, will remain visible from the front of the composition.
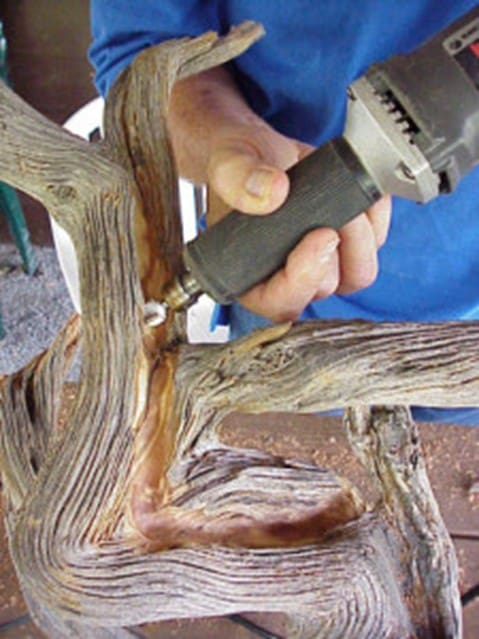
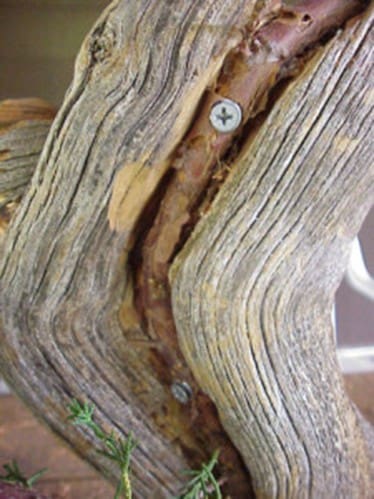
Step Seven
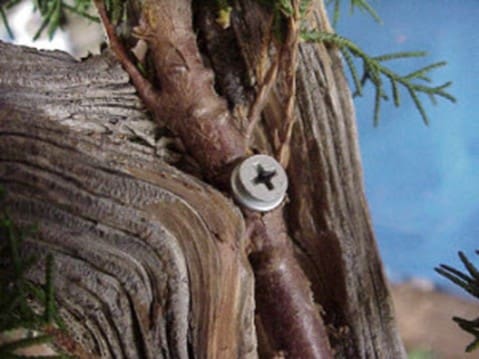
Fit the live tree into the groove and secure it using screws with washers. Work slowly from the base upward, using as few fasteners as possible. Avoid placing roots directly beneath the deadwood base, as this will interfere with seating the snag.
Step Eight
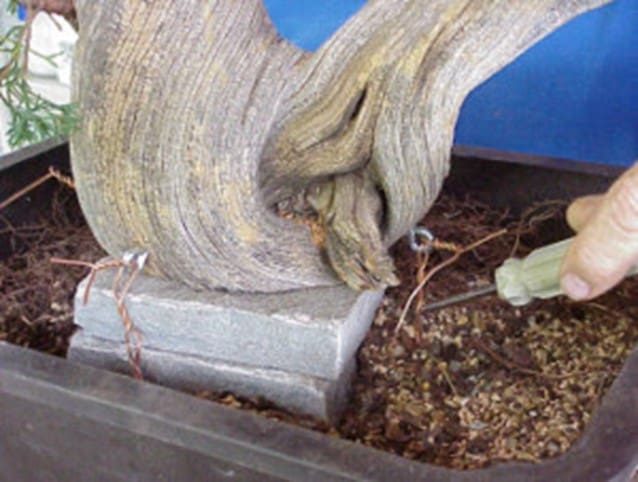
Position the stone and add a thin soil layer. Place the tanuki into the container and gently spread the roots. Remove only enough soil to allow proper placement.
Step Nine
Secure the planting firmly using copper wire threaded through the eyelets. Eliminate air pockets with chopsticks and water thoroughly. Protect the tree from sun and wind for two weeks. Resume feeding after three to four weeks and fertilize heavily for the next two years.
Step Ten
Allow the tree time to grow. After approximately one year, the screws may be removed once the trunk has set. As roots strengthen, the need for heavy tie-down wiring will decrease.

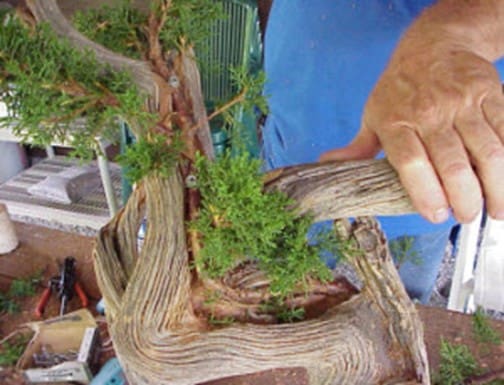
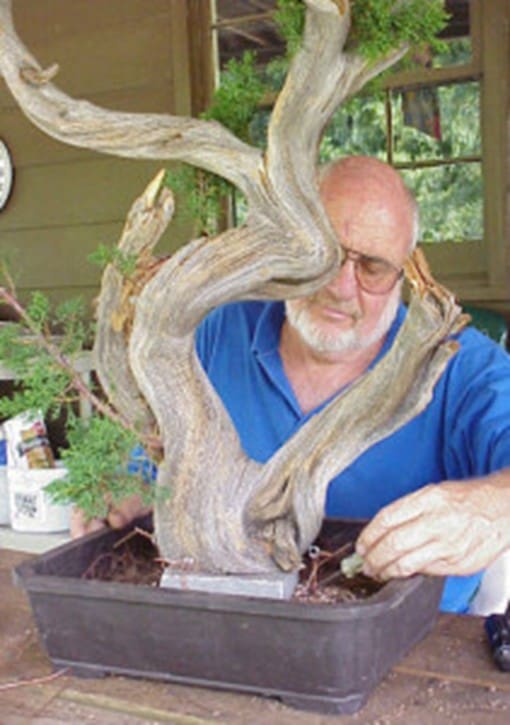
Ongoing Development and Refinement
Once the tree is clearly thriving, traditional bonsai techniques may be applied. Branch wiring, deadwood carving, and refinement of form should proceed gradually.
Do not repot for at least two years, as strong growth during this period is critical to the success of the composition.
Final Thoughts
Tanuki bonsai sit at the intersection of horticulture, sculpture, and philosophy. Whether viewed as playful illusion or serious artistic expression, they demand technical skill, patience, and respect for materials.
Ultimately, each artist must decide how they define authenticity in bonsai. What matters most is not how the tree began, but whether it convincingly tells a story of age, endurance, and natural beauty.
Check out this article next: